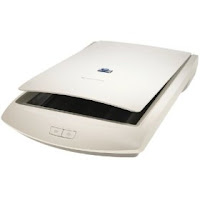
In its questionable wisdom, HP has decided not to support some of its older scanning hardware for Windows Vista. Here's what it says on its website:
"We are sorry to inform you that there will be no Windows Vista support available for your HP product. Therefore your product will not work with Windows Vista.
If you are using the Windows Vista operating system on your computer, please consider upgrading to a newer HP product that is supported on Windows Vista. HP has numerous products on the market that support Windows Vista."
Anyway, there shouldn't be any need. It is possible to install an HP ScanJet 2200c scanner on Windows Vista using Vista's compatibility settings. Here's how (my solution is based on this post on iP3K, to whom much thanks):
- IMPORTANT! Unplug your scanner.
- Download the ScanJet 2200c driver software from the HP website.
- Right-click on the file you have just dowloaded (by default named sj646en.exe) and select Properties and then the Compatibility tab.
- Check the box next to Run this program in compatibility mode for: and then select Windows XP (Service Pack 2) from the drop-down menu. Click OK.
- Double-click on the file named sj646en.exe to install the scanner software and drivers. You may see a Security Warning dialogue warning you that the publisher could not be verified. The file comes from the HP website, so it is safe. Click Run. You may then see a WinZip Self-Extractor dialogue. Take note of the folder that it is being unzipped to i.e. the default location is c:\sj646. Then click Unzip. The Setup program should start automatically. Make sure you exit all Windows programs before proceeding with the Setup program. Proceed through the series of dialogues to install the program.
- Once it has finished installing, go to the folder in which it was installed i.e. the default location is C:\Program Files\Hewlett-Packard\HP PrecisionScan\PrecisionScan LTX (unless you changed it during the installation process) and sort the contents of that folder by type (this will be easier if you are using the Details setting in Views).
- There should be 9 Application (.exe) files:
- hpgreg.exe
- hpipcopy.exe
- hppsapp.exe
- hpsjrreg.exe
- pietro.exe
- regipe.exe
- sendAOL.exe
- sendMapi.exe
- SendTo.exe.
- Now plug in your scanner. Windows Vista should recognize the hardware and use the drivers already installed.

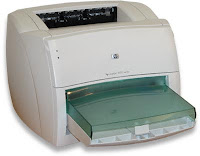
I was very disappointed with HP's (lack of) support policy. Even though I'm very happy with the product itself (and my HP LaserJet 1000 series printer - see picture left - which does work on Windows Vista without any problems), I may take my custom elsewhere next time because of this unsustainable after-"care".
Update (6 March 2015): My HP LaserJet 1000 series printer is still going strong! Here's how I got it to work on my Mac.